How to Download and Install Offic Pro Plus 2021 & 2019
Thank You For Your Order, Below Are Your Activation Instructions, Please Read Carefully.
Step 1
Before you install Office 2021, you need to prepare your computer. It is strongly recommended to have only one Office installed in your computer.
So, before starting the installation process, it is very important to uninstall all previously installed Office versions: old Office, Office 365 or Microsoft 365 trial versions.
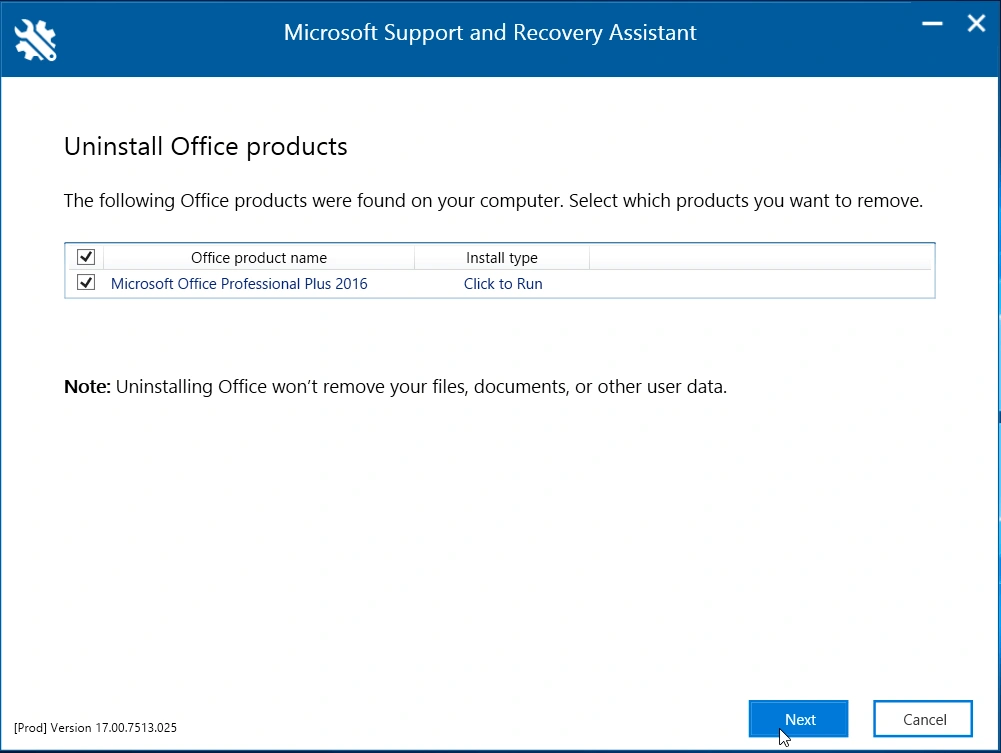
It is recommended to completely uninstall office with the uninstall support tool of the Microsoft Office uninstallation guide and completely uninstall Office with their removal tool named Microsoft Support and Recovery Assistant. You can directly download the tool by clicking HERE.

Step 2
Choose your language and click the link to download the ISO/IMG file. The download process should start after clicking the link. After download is completed, we will explain how to finally install Office Pro Plus 2021 & 2019.
Here is a list of Microsoft official links to download the Office 2021 Professional Plus ISO file.
Here is a list of Microsoft official links to download the Office 2019 Professional Plus ISO file.
Choose your language, click the link to start the download and wait for the download to finish before mounting the file.
It can take 10-20 minutes depending of your internet speed.
You can follow the download progress on your browser using the shortcut CONTROL+J
works in most of the browsers: chrome, firefox, edge, opera…

Step 3
Mounting ISO file
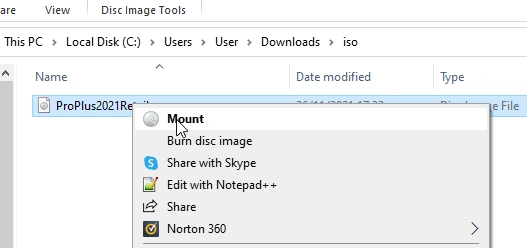
To install Office Pro Plus 2021 and 2019, access your Downloads folder to locate the downloaded ISO file and right-click on the ISO file and select the option mount from the contextual menu. See the screenshot below. This will mount the file as a virtual device and allow you to access it like a pen drive.

Step 4
Installing
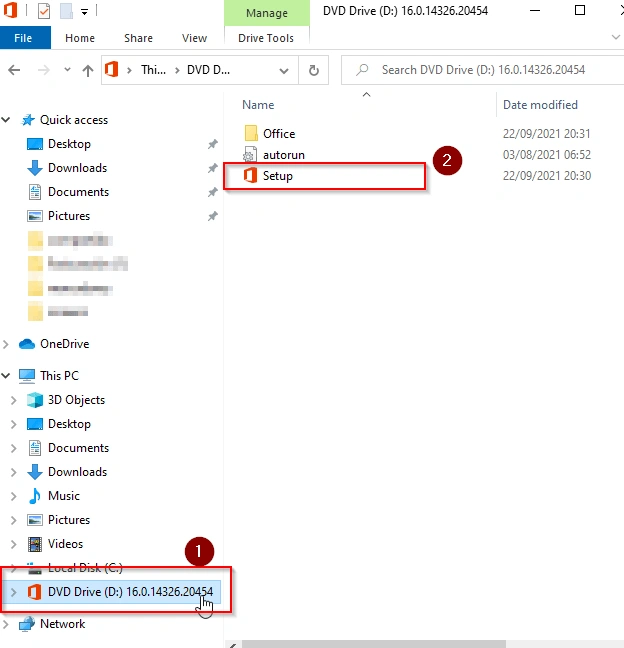
After doing this step, on the left side of this same window, you will see that an Office device appears under This Pc.
Click on the new device (1), and then in the right side of the window you will see the content. Finally, double-click on the setup file. You can see it in the screenshot above as the number (2). This will start the installation process.

However, you may need the 64-bit installation. You can force the 64-bit installation accessing the Office folder and running the file named Setup64.

Step 5
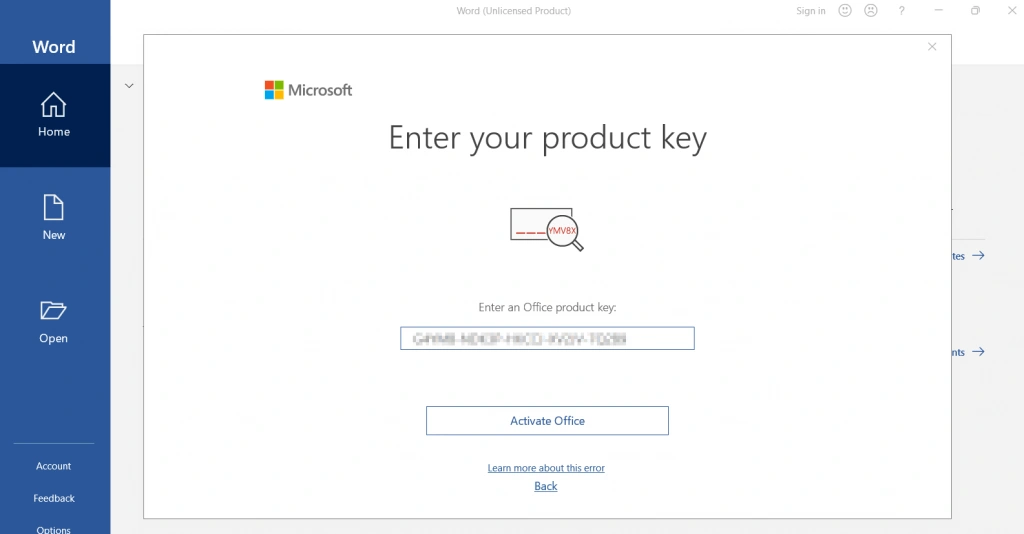
After completing the installation process, reboot your operating system. When done, start one of the Office applications (Word, for example). After some seconds a new window will popup asking to enter the product key. Enter your product key and click the Activate Office button.
That’s all. Now you have your Office completely installed and activated. Enjoy your Office suite.

